I love lasagna, but have never really been a big fan of the ricotta cheese and meat sauce variety. Instead, over the past semester I've been working on my own recipe for awhile now. The carrot bit I got from my Danish neighbors, and the sweet potato is partially inspired by a piece of lasagna I had at a restaurant in Ithaca. Though it could certainly use some tweaking, I'm satisfied enough to share my recipe for a delicious vegetable packed lasagna.
Ingredients (measurements approximate)
16 lasagna noodles
1 sweet potato
1 zucchini
1 red onion
3 cloves of garlic
1 carrot
1 cup of frozen corn
2 cups of tomato sauce
1.5 cups of mozzarella
1.5 cups of mild white cheddar
I started by boiling the noodles in a large pot.
While waiting for the water to boil I peeled and chopped up one sweet potato, into inch square pieces. These I boiled in a separate pot until soft, drained, and then mashed, and set aside.
While those two were going on I sauteed some veggies. I used one onion, one zucchini and 3 cloves of garlic, but really this should be whatever you are really craving to have in your lasagna.
All of this at once isn't as crazy as it seems. The big pot takes a long time to boil, the small one less time, and the sauteing is only about 5 minutes. It's sort of like a nesting doll of cooking tasks, which all works out fine as long as you keep an eye on everything.
Next comes the layering. The start of this is a good time to preheat the oven to 375F
I started by spraying the 9x13" pan with oil, then laying down four noodles, overlapping. The first layer is just the mashed sweet potato, spread out as evenly as possible. Then four more noodles. The next layer is the sauteed veggies. First I spread about a third of the sauce down, then I sprinkled on the veggies, and then about 2/3 of the mild white cheddar shredded. Four more noodles. Then another third of the sauce. Then I sprinkled the shredded carrot over the whole thing, followed by the cup of frozen corn, and then slices of mozzarella. Four more noodles. Then finally the rest of the sauce, a ton of oregano, and the rest of the cheese (this time with mozzarella shredded).
Baked for 30 minutes, covered with tinfoil, and another 10 without, the lasagna came out perfectly. Though, I would recommend a few toothpicks in the middle to keep the tinfoil off the cheese.
Monday, September 21, 2009
Sunday, September 20, 2009
[Inez] Cinnamon rolls
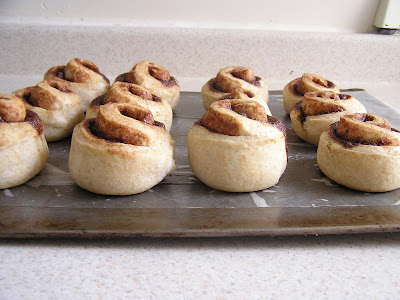
I made cinnamon rolls too! Like Elise, mine was highly experimental. I made a basic bread recipe ( sort of followed a recipe from Laurel's Kitchen that involved scalded milk, but I veered somewhat) and then put cinnamon/sugar/butter/[raisins] and baked it. I made them in 2 batches because I had SO MUCH DOUGH, so I ended up using 2 different methods. I'll discuss.
Then I rolled it into a log, cut it into discs, put it in a pan, let it rise again, and then baked it. While it was baking I went online to read about cinnamon buns, and some peope recommended spreading butter on top, so I did that when they came out of the oven. For the first batch, I kneaded the dough a bit after the first rise, concerned about big air bubbles. After rolling it out I slathered on melted butter and sprinkled a whole bunch of cinnamon sugar.
With the second batch, I didn't knead at all after the first rise. I just punched it down, smushed it a bit, and then rolled it out. Then I tried mixing cinnamon sugar with butter to make a goopy mess, which I slathered (thickly) on the dough.
Also I put melted butter on top of the rolls after the second rise, before baking them. I think this helped keep them nice and soft, not at all crispy on the outside.
The second batch got much taller than the first batch, and had a nicer texture, so I think not kneading after the first rise is definitely the way to go. Also, I prefered the butter mixed with the cinnamon and sugar because I was able to to put a lot more on, which made them good and cinnamon-ey, just the way I like it!
[Elise] Cinnamon Rolls
To bring more togetherness to the blog, Inez and I decided that once a month we would each make the same thing and each post about it. Our inaugural month's sweet: Cinnamon Rolls.
Sunday night and Monday morning, I had semi-successful, highly improvised, cinnamon roll experience.
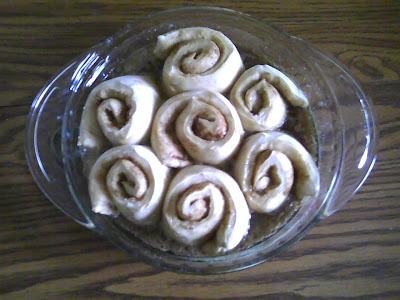
I began by making the dough according to my Grandma's recipe. She makes excellent sticky buns, so this seemed a good place to start. From here the improvisation began. The recipe called for letting the dough rise over night, the rolling out the dough, coating it in cinnamon, sugar, and butter, rolling it up, and slicing it into discs, then placing it in a sugary, syrupy pan, and letting it rise another two hours, then baking it for 25 minutes
Not having 3 hour mornings on Modays, I waited about 4 hours Sunday night, before rolling out the dough. This made 7 rolls instead of the 15 the recipe called for, which actually worked out great because I only had a pie pan and no 9x13" pans.
The next morning I baked at 375F for the requisite 25 minutes and took it out.
After taking one out and eating it, it was delicious, warm, gooey...dough. So I went to class and came back a few hours later, put the rolls in the over for another 20 minutes, and voilĂ !
All in all, they were reasonable. The cooling time in the middle of the baking affected the texture some, and the dough was denser than I would have liked. However, while they may not have turned out quite the way I wanted them to, seeing what changed as I tweaked the recipe was very helpful in understanding the baking process better.
(and, alas, while my digital camera is being repaired, I only have the camera on my phone.)
Subscribe to:
Posts (Atom)