Tuesday, July 9, 2013

[Inez] Boba tea

I thought I had posted about bubble tea before, but I can't find the post.

I love bubble tea (a.k.a. boba tea), but it's pretty hard to find in DC. So I started making it myself. The added bonus to this situation is that I can make it sweet to my liking...or more specifically, not very sweet. To my liking.

Here is what you need to make boba tea:

  • tea (I recommend decaf tea if you are like me and tend to have 2-3 glasses in an afternoon)
  • boba
  • bubble tea straws
  • evaporated milk (or regular milk in a pinch)
  • optional: sugar, molasses, honey, sweetened condensed milk, or any other type of sweetener/flavor
First before anything, you want to make some iced tea. I recommend making a bunch so that next time you can make boba tea on a whim, without first having to brew and cool the tea. I also recommend brewing it pretty strong so it can hold its own against the evaporated milk.

Next you need to prepare your boba.


Boba is basically some type of large dark tapioca. It has a tiny bit of flavor, but mainly it's for the texture. The satisfying chew of it. However, when you buy it from the store (I recommend United Noodle if you're in Minneapolis) it is hard and not chewy at all. Here's the way I like to cook my boba:

Bring a pot of water to boil. Add 1/4 boba per glass of tea you'd like to make. Make only as much as you will use within an hour.


I like to use a lot of water so it has lots of room and cooks quickly. Boil for 5 minutes, then turn off the heat. Cover the pot and let sit in the hot water for 10-15 minutes.

Now, when I've cooked my boba I like to let it sit in a syrup for a while (at least 5 minutes) so it can absorb some flavor. This syrup will also sweeten/flavor your tea. I typically use ~1 teaspoon brown sugar with a bit of honey mixed in. 


In the picture above I have raw sugar with molasses and honey (in shadow on the right), since I didn't have any brown sugar. You could also add ginger or anything else you'd like to flavor your tea with. I like to add my boba to the syrup and then cap the jar, so the boba doesn't lose any moisture while it sits.

Now, to put it all together.


Add your boba and about one cup of tea to a pint glass. Add evaporated milk (I'm going to totally guess and say roughly 1/4 cup) and mix it all together. Don't forget your straw!


Friday, March 29, 2013

[Elise] Mug shelf #1

I've been tinkering around in the shop for a while, learning how to do different things (and preciously counting my fingers). It's a very different experience having free reign of the shop, a lot like how driving stick didn't really click until it was my car. Same principle applies. Screwing up is a lot less daunting if your Dad's not going to yell at you when it eventually happens. That said, I still have an appropriately healthy fear or losing my fingers. But that's good.


This is the second thing I really made from scratch, a shelf for my sister's mugs. Which was a bit more involved than my full sized bookshelf made of simple boards cut to length and finished, supported by copper pipe
I started with a pile of old fir taken out of a family friends garage some time ago. I planed it down to 5/8" to give a nice fresh surface and trimmed it down to a width of 4 1/2". Then I used a router to cut the front bottom edge of the best looking boards before cutting them into five shelves. From the boards that had something off about the front or back edges I cut the narrower strips to form the sides of the shelf. After very carefully measuring and remeasuring the placement of each shelf I used the radial arm saw to cut the dado cuts in which each shelf fit. Then I cut out the designs with the band saw. 


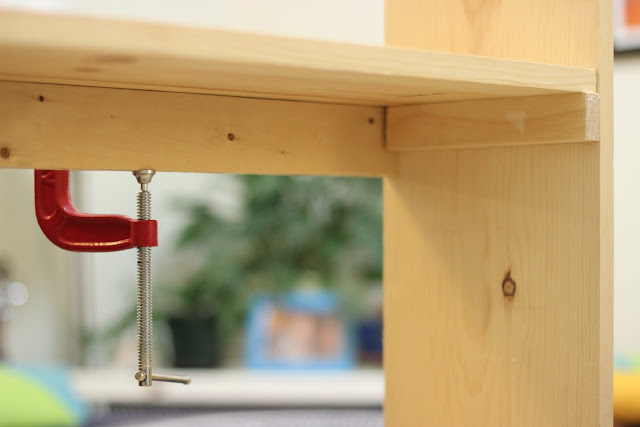
First I did this with a few scrap pieces to make sure everything fit together and to make sure that the cut out looked nice in practice and not just in theory. After cutting all the final pieces everything was once each with medium and then with fine grit sand paper. Then  and held my breath until everything was glued, clamped and nailed. Success, everything fit and was relatively square


At this point I added two vertical crosspieces to be used for mounting. After all the clamps came on came staining and waxing. I waffled a long time about the finish and ended up choosing wax because I wanted something that would offer some protection but that would make the wood look soft and natural (and boy it even felt soft).

These are closeups of the finished piece still drying in my shop (which is why they are horizontal) of the top, middle (x2) and bottom details. All told, I used six different machines with fast spinning blades. Between sanding and finishing I touched every square inch of wood ten times; sanding everything twice, applying stain, removing excess stain, and applying, wiping excess, and buffing two layers of wax. This was all in the day before visiting my sister (pushed up a day to avoid a snow storm). That night I was touching it in my sleep. It turned out almost precisely as I had pictured it. This worry was the main cause of procrastinating the project, originally a Christmas present, but actually made almost entirely in one week in February (the wood was initially planed in December).

I drove it across Wisconsin the next day, still smelling like stain, wax and freshly cut wood to my sister's house, and we put it up that weekend, replacing two of those accordion peg racks, where each mug hung precariously and a few more were stacked upside down on the table.  Not a bad improvement.

Before


After

Monday, March 4, 2013

[Inez] Quilting (Part 2)

Oh my gosh, I forgot to update along the way. I finished my quilt! I started it in October and just finished it a week ago, so all told it took about 5 months.


When we left off I had sewn my 19 rows, and needed to start putting it all together.

Here are the components a quilt:
  • piecework (this is where you sew together all the pieces of the top side of the quilt)
  • batting (this is the stuff that goes in the middle and makes the quilt warm)
  • backing (this is the bottom side of the quilt, typically muslin or flannel)
  • binding (this is the fabric that runs the perimeter of the quilt)
So I sewed together all of my 19 rows, which, by the way, is a terrible way to make a quilt. I hadn't cut everything perfectly the same width which meant it was really hard to sew everything in straight lines and I ended up using some lumber as a long straightedge and our dining room table is only big enough to hold about a quarter of the quilt at a time and it was kind of a nightmare. People make quilts by creating squares and sewing them together for a reason, and it's so they don't lose their sanity. My rows ended up crooked and I had to cut a bunch off of the ends to make my angles square, and then add some more back onto the ends to make it long enough again. 

Finally I got that straightened away and was able to pin down my batting and cut it roughly to size. I wanted to hold these layers firmly together while I got my backing situated, so I stitched in the ditch for a few long rows. That means I sewed following an existing seam so that you can't see it in the final product.


I've learned in the last year or so that "quilting" does not refer to making a quilt. "Quilting" refers specifically to the stitching that holds all of the layers of a quilt together. It is often decorative (sometimes highly intricate), but doesn't have to be. I decided to go with a starburst pattern, in part for simplicity, and in part to draw the eye away from my crooked rows.


Here are all of the layers quilted together, awaiting binding.


I have to give a lot of thanks to the lady (Youtube username: ctquiltingvideos) who made this video on binding, because it was INCREDIBLY helpful. I learned so many tricks and shortcuts. Let me give you the brief version.

When binding a quilt, you will sew together a bunch of long narrow strips of fabric to create a super long strip that is as long as the perimeter of your quilt plus like 10 or 20 inches, just to be safe. The strips will be 6 times as wide as you want your binding to be. I wanted 1" binding, so I used 6" wide strips.

You fold these strips in half and iron them. Then you pin them to your quilt, rough edge to rough edge. So the folded edge of your binding will be away from the outside of your quilt, and the two loose edges will be up against the edge of your quilt. Sew that down at just under your desired width.


Once you've sewn the binding all the way around your quilt, fold it over so that the fold makes a nice clean edge on the other side. Then I stitched in the ditch on the back side, so that there wouldn't be an extra seam showing. Because I had sewn the back at slightly narrower than I wanted, when I stitched in the ditch there was a bit of an overhang on the front for the seam to catch onto.


Some people do this last step of the binding by hand using invisible stitching, but that seemed like an awful lot of work. I just wanted to be done.

And so I was! Check it out!!


Now my bed has a colorful, cheery quilt to brighten up the room in the winter. Hooray!

Sunday, February 24, 2013

[Inez] Shelving

My house had a problem. Colin got serious about baking bread and I can't stop buying cookbooks, and our baking stuff was scattered across four different storage areas. Only one solution to this problem, in the eyes of Mr. Fix-it.


Make a new set of shelves.


I really had no part in this endeavor, so this will be purely photo-documentation.


Kirby was really concerned about the situation and stood about three feet away from Colin the entire time. Out of range of the circular saw, but close enough to be nearby should he need her assistance.


Oh, I did help! I picked out the fabric to use for backing.


Ta-da!


I can't buy anymore cookbooks because they just exactly fit.


Sunday, January 20, 2013

[Inez] Honey Almond Butter Chocolate Tart

Joy the Baker has yet to fail me on a recipe. Her Honey Almond Butter Chocolate Tart is divinely decadent. It is a bit time consuming (tart shell, almond mousse filling, chocolate ganache), but if you're craving a labor of love with a rewarding finish, then try this. The recipe can be found on her website.