Tuesday, December 6, 2011

[Inez] Wedding cake plans

My dear friend (and roommate for three years) Stephanie Wu just got engaged to her boyfriend of 4 years! I couldn't be more happy for her. She's eaten many of my birthday cakes, and she loves them so much that she asked me to make her wedding cake!!! I just tentatively agreed. The wedding will be on the first or second weekend in June, so stay tuned while I become totally obsessed with wedding cake... done my way. A.K.A. beautiful, delicious, and not too fancy.

Here is where I'm starting:
  • Joy the Baker (one of the food blogs I follow) chronicles her first step into Wedding Cakelandia, with advice on how to use dowels to support the layers needed to feed 100 people.
  • The man in this couple made their wedding cake, and he had the clever idea to make a smaller pretty cake to cut and then a big ole sheet cake to feed the masses. Interesting.
I know, I know, there are no pictures in this post. I'll put up some pictures of a mocha cake I made last month soon. And Elise has promised to help me revive this blog, too!

Monday, September 19, 2011

Pink apron for Becca


So.... this is going up extremely late. It was supposed to go up during Pink Month (July), but.... I failed. Elise obviously can't talk because she's been kind of otherwise occupied and is now on a long-ass road trip so it's not like she's been posting, but I still feel bad because this has been done for ages.


So anyway, I made Becca a birthday present, um, three months late. It's an apron, and it's pink, and I think it's pretty. I made the pattern up myself, and in the process learned that sewing hearts is HARD. Here are some pictures -- probably more than you want to see of an apron, but humor me.


Friday, July 15, 2011

[Inez] Pink coconut cake

Okay, I actually made this particular cake a little while ago, but I was saving it for July (which is PINK MONTH), and then, well, I don't know why it's taken me 15 days to put up. Anyway, I made a coconut cake. I dyed it pink, and I put dinosaur sprinkles on top.


Let's talk about this cake for a minute. The process for making it is a bit different than any other cake recipe I've used. Also it asks for cream of coconut, which I didn't know was a thing. The result is a light, fluffy, very moist and flavorful cake. I highly recommend it. I actually now keep cream of coconut on hand specifically so I can make this cake when the urge hits without having to plan extremely in advance.


First of all, let me preface this recipe by telling you it's from The New Best Recipe (a cookbook by the Test Kitchen) which means two things: 1) guaranteed to be good, and 2) pretty much guaranteed to be a bit of an involved process. The first thing it asks you to do is mix your dry ingredients, and then add your butter one tablespoon at a time with the mixer running. At first it will look like this:


But keep mixing until it looks like this:


It should be kind of like sand, with little bits no bigger than peas. Then you add your wets (don't worry, I'll put the recipe at the bottom) and I also added red food coloring, just because. 


When everything is nicely mixed, divide it evenly between two (greased and wax papered!) cake pans and bake.


Okay, The New Best Recipe called for a very involved coconut buttercream and I was like, "First of all, that's a lot of coconut, and second of all, that is too many steps." I like my frosting to be simple and delish. So I made a simple cream cheese buttercream (the butter improves the texture). 


Have I talked to you about crumb coats before? A crumb coat is where you put on all the filling between the layers, and then you put a very thin coat of frosting to cover the entire outside, and you stick it in the fridge for 15 minutes. If you're in a hurry, this obviously won't work, but it really does make it easier to frost and eliminates the worry about getting cake crumbs on the outside of your frosting. It looks like this:


Okay, so your crumb coat is all set. Now frost this puppy for real. I'm a little OCD about this kind of thing, but you don't need to worry about making it too pretty. It will be covered.


Oh, my newfound trick for frosting is to put it on a lazy susan and then I can just go all the way around without stopping.


Okay so once your cake is all frosted, you cover the whole outside with your toasted coconut. Protip: set some of it aside so it stays whole and pretty. You kind of have to smush it on to the side, but you're going to want some nice full curls for the top.


If you're a normal person, congratulations! You're done! If you're obsessed with dinosaur sprinkles like I am, you should probably put some on your cake. You can pretend that your dinosaurs live in a coconut jungle if you want.


And voila! You're done. 


(I recommend smallish pieces because this cake is kind of intense.)


RECIPES

Coconut Cake (from The New Best Recipe)
  • 2 1/4 c cake flour, sifted. If you don't keep cake flour on hand, you can add 1 T of cornstarch per cup (minus 1 T) of allpurpose flour
  • 1 egg + 5 egg whites
  • 3/4 c cream of coconut
  • 1/4 c water
  • 1 t coconut extract (I used imitation coconut and it was still good)
  • 1 t vanilla
  • 1 c sugar
  • 1 T baking powder
  • 3/4 t salt (but be sure to reduce this if you use salted butter)
  • 12 T unsalted butter (1 1/2 sticks) cut into 12 pieces (Butter should be softened but still firm)
  1. Grease 2 9-in cake pans and preheat to 325.
  2. Mix your dries (including sugar) in a big bowl
  3. With a mixer on the lowest speed, add the butter 1 T at a time, then beat until the mixture resembles coarse meal, with butter bits no larger than small peas. 
  4. Beat eggs with a fork to combine. Add the cream of coconut, water, coconut extract, and vanilla and beat with a fork till combined.
  5. Add 1 c of the egg mixture to flour/butter mixture. Mix at medium-high till light and fluffy (~45 sec). With mixer still running, slowly add remaining liquid. Stop the mixer and scrape sides down. Beat at medium high till combined (~15 sec).
  6. Divide batter between cake pans.
  7. Bake ~30 min. The recipe said till deep golden brown, but my cakes stayed fairly white even when they were clearly done. It took pretty much 30 min on the nose for me.
While cakes are cooling, toast 2 c of sweetened shredded coconut about 15-20 min until a mix of white and golden brown flakes (don't overtoast!).


Cream Cheese Buttercream (from Inez's head)

  • 2 packages cc
  • 1 1/2 c UNSALTED butter (I accidentally used salted the first time I made this and you could tell)
  • 1 t vanilla
  • 1 T cream
  • powdered sugar to taste (not sure how much I added, maybe 1 c or so?)
  1. Cream butter. Add cc and beat until smooth. 
  2. Add vanilla and cream, beat.
  3. Gradually add powdered sugar until it tastes amazing.

Sunday, June 12, 2011

[Inez] Cold press coffee


Let's talk about coffee. Mmm, coffee. Coffee that's cold. I like cold press coffee because a) it's delicious, b) it's cold, and c) it feels like a treat, but it's not loaded with sugar.

Cold press coffee is coffee that is brewed over the course of several hours without getting the coffee hot. This means that it has no bitterness. It's usually made pretty strong, so that it can be diluted with ice and milk. For a regular sized french press, you'll need 2/3-3/4 cup beans.


Grind those babies, throw them in your french press, fill it to the top with water and stir it up. Then just cover it and leave it on your counter or in your fridge for at least 4 hours, or do like I do and leave it overnight.


Now, a certain coffee snob I know says it's much better if you filter the coffee rather than just pushing the press part of the french press down, and it has something to do with not stirring it after it's brewed or something. For a fairly non-coffee snob like myself, I can't taste the difference, and the french press is so much quicker.

So basically, filter it as you see fit, and then pour it over lots of ice.


Some people think it's perfect just like this, and it's true that plain cold press coffee, if you use good coffee, is sweet and flavorful and delicious as is. But I say, what can't be improved with some whipping cream?


Very little, that's what.
(Or half and half, or milk. It's all good).

Friday, June 10, 2011

[Inez] Chocolate cupcakes with Greek yogurt frosting


In honor of June being brown month, I made some chocolate cupcakes. Life is tough.

I used my go-to Compost Cake recipe for the cupcakes, because it's delicious and it's easy and it's delicious. Did I mention it's really delicious? Also I don't really have enough muffin tins so I ended up with like a cupcake's worth of batter left in the bowl that didn't fit, which I was forced to eat. Did you know it's a crime in some countries to let cake batter go to waste? Like my house, for example.


Uh, and then I forgot to take any pictures of the frosting-making process, which was New and Different. I wanted something a little bit tangy, but not cream cheese because I always do cream cheese. So I decided to try making frosting out of yogurt! Here's what I did:
  • 2 c Greek yogurt
  • ~1 c powdered sugar
  • 1 c whipping cream
  • 2 t vanilla
  • 1 1/2 oranges worth of zest
  • a splash of orange extract
  • a pinch of salt
Mix the yogurt, vanilla, sugar, orange zest, and orange extract in a large bowl. 
Whip the cream until stiff but not too stiff.
Fold the whipped cream into the yogurt mixture.

Some thoughts about the frosting: I don't know if it's because it didn't have as much fat as frosting usually does or what, but it tasted a little bit flat.  That's why I added the salt. I think it would have been good with a bit more salt, maybe 1/4 t or so, but since I added it at the very end it was kind of difficult to incorporate adequately, so I didn't add a second pinch. It was also a bit too tangy for the cake (made the cake taste really sweet! even though it's more of a bittersweet cake usually), but that flavor did mellow out after the first day. Overall, it was a fun experiment and I would do it again but I would probably pair it with something fruity (especially citrus), rather than chocolate.

Anyway, since the frosting was white, I was worried the cupcakes wouldn't be brown enough for Brown Month. Grated chocolate solves most problems, as it turns out.

Thursday, June 2, 2011

June is Brown!

Now, I realize that may not sound very exciting, or very summery, but I promise you it will be. Just think coffee and chocolate. Yum. Also, wood, but no promises there. 

Wood Ball courtesy of a gift shop in Annapolis [Inez]

[Inez] Mojitos

This is actually from last month, but I was slow in posting. Stephen had a craving for mojitos, so we made some. You probably know how to make mojitos, and if you don't it's probably because you don't drink so you can go ahead and just skip this post, except that the mint is kind of pretty.

Mojitos. Mint (lots) and sugar (a couple teaspoons, to taste), and muddle it up.


Oh wait! Don't forget the lime. Cut a lime into wedges and add one half to one lime per mojito (to taste), then muddle it up. Muddle, in case you don't know, means mush it up with something that looks sort of like a very small baseball bat. To get the juice and the mint flavor and everything.


Add some ice to your glass and top it off with seltzer (a.k.a. club soda, a.k.a. sparkling water... yes, we had this conversation while making mojitos).


Basically delicious. I would venture to guess that this would also be delish and refreshing as a nonalcoholic beverage - just the mint, lime, a little bit of sugar, and seltzer. 

Wednesday, June 1, 2011

[Inez] Yellow flowers

Can we pretend for a second that it's still yesterday? Because May was Yellow Month and I've got yellow flowers to show you!

#1: These things whose name does not stick in my head, and Elise, I could go look at your comment on that other post but I don't feel like it.


#2: Our wildflowers are EXPLODING! I'll take more pictures when I'm not running late for work as I photograph (right now it's rainy so not good light for picture taking, either).

Monday, May 9, 2011

[Becca] Yellow!


Hello again! It's been a year since I last contributed anything, so I decided it was time to share. It's not that I haven't been making anything beautiful/delicious, it's more that I never remember to take pictures. So, when Elise came over so we could make cookies (about which she will most likely be posting soon), I used the opportunity to take pictures of my preserved lemons.

I hadn't realized that there was such a thing as preserved lemons until recently, though I guess if I'd ever put much thought into it I would have assumed they existed in some fashion, but I'd just never thought to think about it before. That is until my friend started raving about the preserved lemons she made, and how delicious they were, and how easy they were to make. So I asked her for the recipe and she sent me this blog post.

I stuck close to the recipe, using larger lemons, because that's what I found, and skipping the embellishments, mostly because I took too long making up my mind as to which ones I wanted, and then forgot all together at what would have been the appropriate time to have made a decision. The jar I used didn't have an opening quite wide enough, so I struggled a bit getting the lemons in, but figured I was going to squash them anyway, so it wasn't a problem that they got squashed on their way in. Then when I went to squish them down the second day I decided there was enough space to add another lemon, and really, if they are going to sit for a month, will one day fewer make that much of a difference?

So now I am waiting. And dreaming of couscous and lemon ice cream.

Usually the lemons sit above the sink, adding cheery color to the kitchen. But for the purpose of my lemon photo shoot, I decided to move them to the mantel in the living room. Next to the yellow flowers picked at my uncle's farm and put into the yellow vase that my dad made.

[Inez] Things maybe only Elise cares about

You know we love you, gentle readers, but this was originally a blog for Elise and I to share with each other, so I'm going to use this post to show Elise some of the home/garden improvements we've done since she moved back to Minnesota. Elise, I think you'd be proud of us. I'm going to start in the front and work my way back.

Yesterday I went to Ginkgo Gardens with Colin so he could get some mulch and pepper plants, and I ended up getting stuff to line the front sidewalk.


I got Cheddar Pinks (the pink flowery things), Stonecrop (the low spready thing, which will apparently have flowers later in the summer, too), and these orange and red things that I absolutely love and whose name I don't know. These:


We also planted along the front walk with bulbs (which sort of did okay), and with wildflowers. Right now it just looks kind of weedy, but there are these little white things that have started blooming within the past couple days:


The flowers are probably .5-1 cm across, and low to the ground (6 in high or so). These are from the low wildflower mix you left.

Along the back of the front yard (against the front porch), we planted two little rose bushes from Home Depot, and the yellow sunflowers you left. I also planted two canna lily bulbs I got from Fragers, and in front of all that we planted some of your tall wildflower mix.


This is the left side of the porch. We've got a potted rosemary, a bitty rose bush, some thriving sunflowers, and if you look closely on the lower right you'll see my bitty canna lily (hiding between the sunflowers), doing quite well in spite of its large neighbors. I thinned the sunflowers out around the lilies so that they will still get light.

The rose bush on the right (by the stairs) is doing really well, and already has buds! (We were worried they wouldn't bloom at all this year.)

Look, I worked something beautiful and yellow into this post!

For inside we got a new hanging plant for the other living room doorway, and a little begonia which lives next to the TV, where it has a chance of getting some light. It goes really nicely with the curtains (that sounds dumb, but it really does).


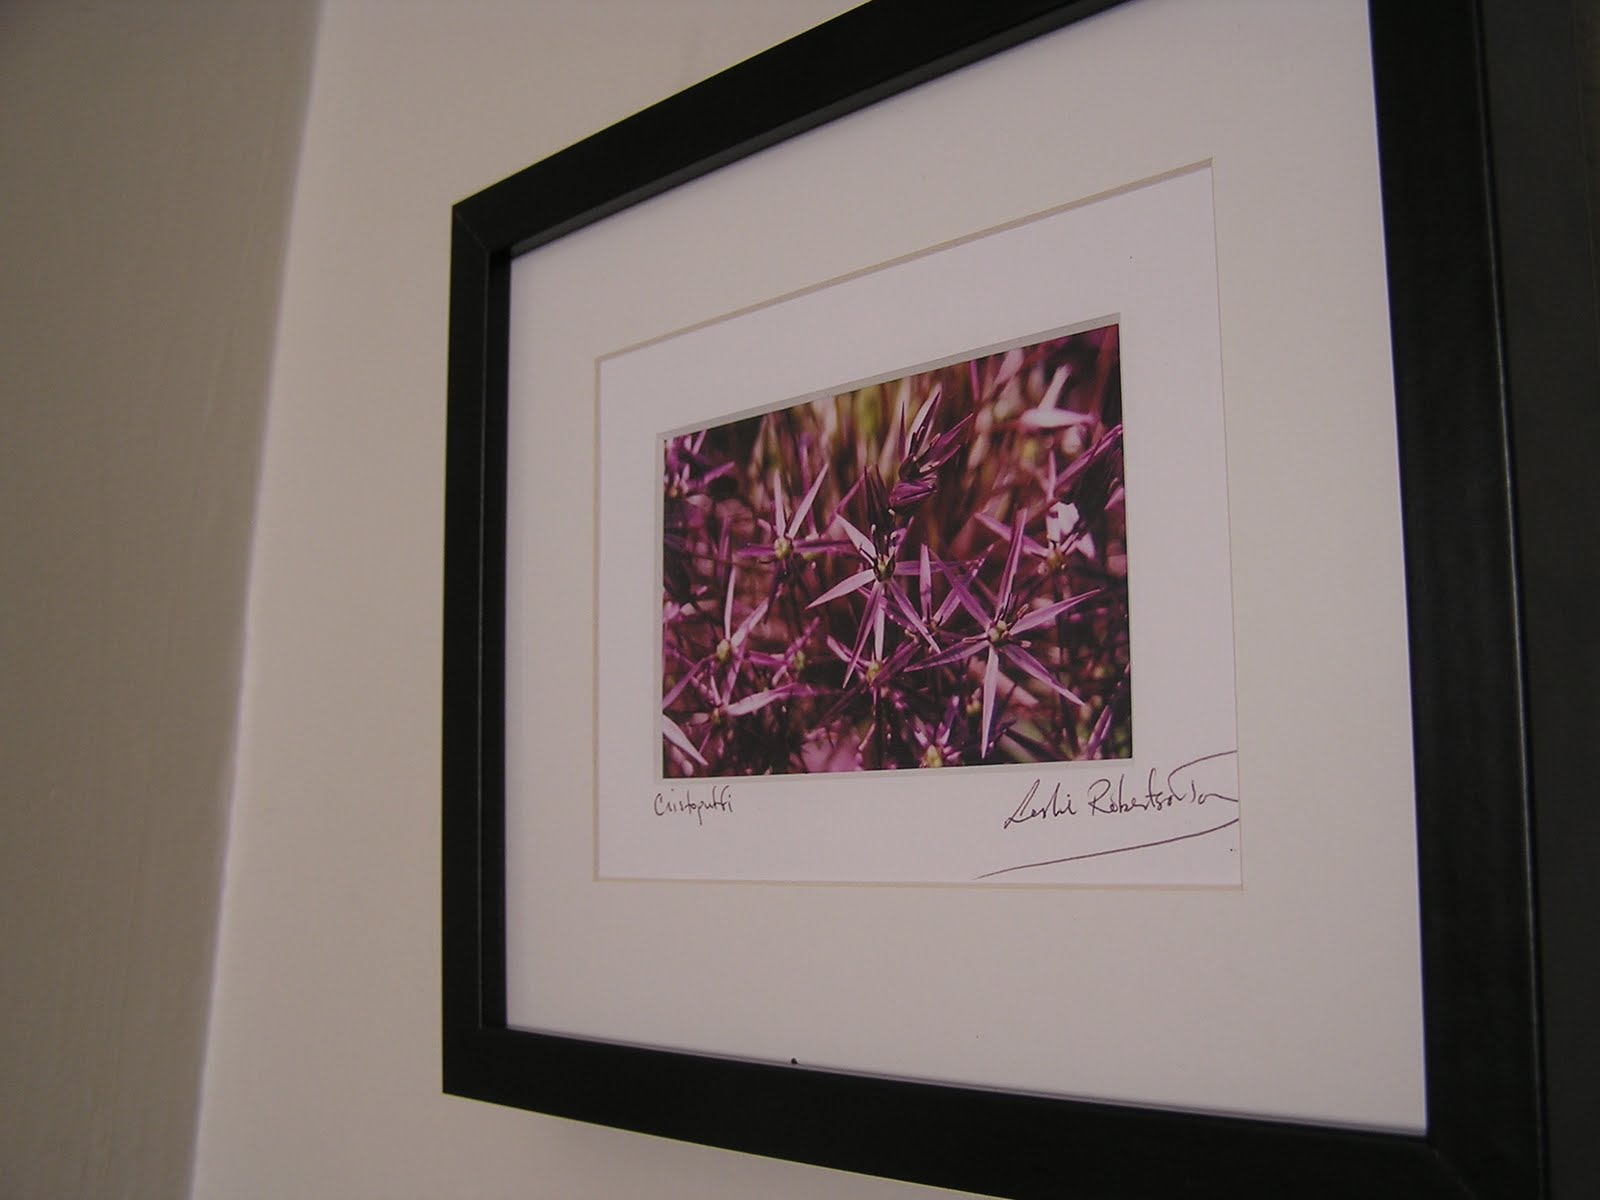
Last Saturday was the big Brookland yard sale day, and I got this pretty photograph.


I hung it on the little bit of wall above my vintage blue chair (looking from the living room to the dining room).


In the back, the boys planted 8 (!) tomato plants, and four little strawberry plants in a big pot. Also some lettuce. The tomato plants are doing really well and getting quite big! I guess we should get some cages...


The lettuce looks like an alien life form right now, to me.


And the strawberries are doing so well that I think we might need to build them a trough so they have room to spread out.


Wednesday, May 4, 2011

[Elise] Wild Rice Curry

This is a yellow curry with wild rice and onions, topped with pan fried sweet potatoes. Yum.


 I love sweet potatoes. If I could put them in every single entrĂ©e I make without everyone I cook for being absolutely sick of them, I would. For a change of pace I got some yellow fleshed sweet potatoes. They're a little starchier but still sweet, providing a nice crunch to contrast the soup.

The recipe I got a few years ago from La Fuji Mama  and when it's done it is the most vivid yellow. It was this yellow that stuck in my mind while I took off for the grocery store without a list and not having looking at the recipe since the night before.

I went to the store knowing I had all but three things; a can of coconut milk, yellow curry (right? I mean, the soup is so yellow, how could it not be yellow curry), and... something else. What was that something else?
I went to a few different grocery stores which all had the same selection of "Thai Ktichen" curry pastes: one red, one green, a chili paste, and a satay peanut sauce. Finally I went to a Vietnamese market, where I finally found yellow curry, and big cheap tub of it instead of a little expensive jar. I need to remember to go here more often. I'm also going to need to make a lot more yellow curries.

Finally I got home and started cooking only to realize that the recipe actually calls for red curry. Go figure.


I did find that the yellow curry tasted wonderful in the recipe. It had a very warm spice that was more than I had expected without being overpowering.


Also, I got a round about compliment from my dad, when asked if the two week old bread tasted any good, or if it just tasted like stale bread with good soup on it.